Now, Bigger Social Security Later? Genius or Risky?")


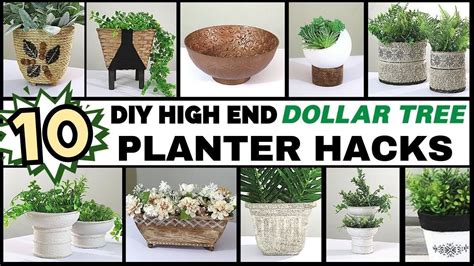
Ordinary Dollar Tree planters can be transformed into stylish and eye-catching home décor with simple do-it-yourself (DIY) techniques, offering an affordable way to elevate indoor and outdoor greenery.
With a few inexpensive materials and readily available tools, even the most basic plastic planters from Dollar Tree can achieve a high-end look, challenging the notion that beautiful home décor requires a significant investment. Several DIY enthusiasts have demonstrated how to revamp these planters using techniques such as painting, adding texture, and incorporating embellishments.
One popular method involves using spray paint to give the planters a fresh, modern appearance. Matte black, metallic gold, and bright white are among the colors frequently chosen to complement various design aesthetics. For a more textured look, DIYers often apply baking soda to the paint, creating a chalky, rustic finish that mimics the appearance of aged terracotta or stone. “I like to use spray paint because it’s quick and easy,” says a DIY enthusiast who shared her techniques online. “But you can also use acrylic paint for more detailed designs.”
Beyond paint, other accessible materials can be used to add dimension and visual interest to the planters. Rope, twine, and wooden beads can be glued around the planters to introduce a nautical or bohemian vibe. Faux moss and pebbles can be attached to the surface to create a natural, earthy aesthetic. For those seeking a more glamorous look, rhinestones, glitter, and metallic leafing can be applied to create sparkling, eye-catching designs.
These DIY transformations not only enhance the aesthetic appeal of the planters but also allow for personalization, enabling individuals to match their home décor style. By upcycling inexpensive items, individuals can reduce waste and create unique, customized pieces without breaking the bank. The versatility of these techniques means they can be applied to planters of various sizes and shapes, making it easy to create a cohesive and visually appealing display of plants.
The trend of upcycling Dollar Tree planters reflects a broader movement toward affordable and sustainable home décor. As more people seek creative ways to personalize their living spaces without overspending, these DIY projects have gained popularity on social media platforms like Instagram, TikTok, and Pinterest, where users share their transformations and inspire others to try their own.
Detailed Techniques and Materials
The transformation of Dollar Tree planters into sophisticated décor pieces relies on a range of readily available and inexpensive materials, coupled with straightforward DIY techniques. Each method offers a unique aesthetic, allowing for personalization to suit individual preferences and home décor styles.
-
Painting Techniques: Painting is the most common and versatile method for revamping Dollar Tree planters. Spray paint is favored for its quick application and even coverage, while acrylic paint allows for more detailed designs and customization.
- Spray Paint: Matte finishes are popular for a modern, minimalist look, while metallic colors like gold, silver, and copper can add a touch of glamour. When using spray paint, it is important to apply multiple thin coats to avoid drips and ensure even coverage. Proper ventilation is also crucial, and a respirator mask is recommended to avoid inhaling fumes.
- Acrylic Paint: Acrylic paints offer a wider range of colors and finishes, allowing for more intricate designs. They can be applied with brushes, sponges, or even stencils. Mixing acrylic paint with other materials, such as baking soda, can create textured finishes.
- Chalk Paint: Chalk paint is another popular option for achieving a vintage or rustic look. It adheres well to plastic and can be easily distressed for an aged effect. Chalk paint is also low-VOC, making it a more environmentally friendly choice.
-
Texturing Techniques: Adding texture to the planters can create a more visually interesting and tactile surface.
- Baking Soda: Mixing baking soda with paint creates a chalky, textured finish that resembles terracotta or stone. The amount of baking soda added will determine the level of texture. Generally, a ratio of 1 part baking soda to 2 parts paint is recommended.
- Sand: Similar to baking soda, sand can be mixed with paint to create a gritty, textured finish. This technique is particularly effective for creating a rustic or coastal look.
- Joint Compound: Joint compound, typically used for drywall repair, can also be applied to planters to create a textured surface. It can be applied with a putty knife or trowel and then sanded down for a smooth, uneven finish.
-
Embellishment Techniques: Embellishments can add dimension, visual interest, and a touch of personality to the planters.
- Rope and Twine: Wrapping rope or twine around the planters can create a nautical or bohemian vibe. Hot glue is typically used to secure the rope or twine in place. Different thicknesses and textures of rope and twine can be used to create different effects.
- Wooden Beads: Wooden beads can be glued around the planters to add a natural, textured element. They can be painted or stained to match the overall design.
- Faux Moss and Pebbles: Attaching faux moss and pebbles to the surface of the planters can create a natural, earthy aesthetic. Hot glue or craft glue can be used to secure the moss and pebbles in place.
- Rhinestones and Glitter: For a more glamorous look, rhinestones and glitter can be applied to the planters. Craft glue is typically used to adhere these embellishments.
- Metallic Leafing: Metallic leafing, such as gold or silver leaf, can be applied to the planters to create a luxurious, eye-catching design. Adhesive sizing is used to adhere the leafing to the surface.
-
Sealing and Protection: After completing the desired transformations, it is important to seal and protect the planters to ensure their longevity.
- Clear Coat Sealant: A clear coat sealant can be applied to protect the paint and embellishments from chipping, fading, and water damage. Matte, satin, and gloss finishes are available, allowing for further customization.
- Waterproof Sealant: For planters that will be used outdoors, a waterproof sealant is essential to protect them from the elements.
Impact on Home Décor Trends
The trend of upcycling Dollar Tree planters reflects a broader movement toward affordable and sustainable home décor. As consumers become more conscious of their spending habits and the environmental impact of their purchases, DIY projects that repurpose inexpensive items have gained popularity.
- Affordable Décor: The rising cost of home décor has led many consumers to seek more affordable alternatives. DIY projects that utilize Dollar Tree planters offer a budget-friendly way to personalize living spaces without overspending.
- Sustainable Living: Upcycling reduces waste and promotes sustainable living practices. By repurposing inexpensive items, individuals can reduce their environmental footprint and contribute to a more circular economy.
- Personalization: DIY projects allow for personalization, enabling individuals to create unique, customized pieces that reflect their personal style. This is particularly appealing to those who want to create a home that feels authentic and reflective of their personality.
- Social Media Influence: Social media platforms like Instagram, TikTok, and Pinterest have played a significant role in the popularity of DIY home décor projects. Users share their transformations and inspire others to try their own, creating a community of DIY enthusiasts.
Examples of Transformations
Numerous examples of Dollar Tree planter transformations can be found on social media platforms and DIY blogs. These examples showcase the versatility of the techniques and the wide range of aesthetic possibilities.
- Modern Minimalist: A Dollar Tree planter can be transformed into a modern minimalist piece by simply spray painting it with a matte black or white finish. Clean lines and minimal embellishments characterize this style.
- Rustic Farmhouse: A Dollar Tree planter can be given a rustic farmhouse look by mixing baking soda with paint to create a textured finish. Distressing the paint and adding twine or rope can further enhance the rustic aesthetic.
- Bohemian Vibe: Wrapping rope or twine around a Dollar Tree planter can create a bohemian vibe. Adding wooden beads, faux moss, and other natural elements can further enhance the bohemian aesthetic.
- Glamorous Design: A Dollar Tree planter can be transformed into a glamorous piece by applying rhinestones, glitter, and metallic leafing. Metallic spray paint can also be used to create a luxurious look.
- Coastal Style: A Dollar Tree planter can be given a coastal style by painting it with light blue or white paint and adding seashells, sand, and rope.
Tools Required
The tools required for these DIY transformations are typically basic and readily available in most households.
- Paintbrushes: Paintbrushes are essential for applying acrylic paint and other liquid finishes. A variety of brush sizes and shapes may be needed for different applications.
- Spray Paint: Spray paint is used for quick and even coverage. It is important to use spray paint in a well-ventilated area and to wear a respirator mask to avoid inhaling fumes.
- Hot Glue Gun: A hot glue gun is used to adhere embellishments such as rope, twine, wooden beads, and faux moss.
- Scissors: Scissors are used for cutting rope, twine, and other materials.
- Sandpaper: Sandpaper is used for smoothing rough surfaces and distressing paint.
- Mixing Bowls: Mixing bowls are used for mixing paint with baking soda or other additives.
- Drop Cloth: A drop cloth is used to protect surfaces from paint and other materials.
- Respirator Mask: A respirator mask is recommended when using spray paint or other materials that may produce fumes.
Environmental Considerations
While upcycling Dollar Tree planters is a sustainable practice in terms of reducing waste, it is important to consider the environmental impact of the materials used in the transformation process.
- Paint: Choose low-VOC (volatile organic compound) paints whenever possible. VOCs are chemicals that can be harmful to human health and the environment.
- Adhesives: Use non-toxic adhesives whenever possible.
- Recycled Materials: Incorporate recycled materials into the projects, such as recycled rope, twine, or beads.
- Proper Disposal: Dispose of paint cans, adhesive containers, and other waste materials properly. Check with local authorities for information on hazardous waste disposal.
FAQ Section:
1. What kind of paint works best on Dollar Tree plastic planters?
Spray paint, particularly matte finishes, is widely favored for its ease of use and even coverage on plastic surfaces. Acrylic paints also work well, allowing for more detailed designs. Chalk paint is another excellent option for a vintage or rustic aesthetic. “I like to use spray paint because it’s quick and easy,” according to one DIY enthusiast, though acrylic paint offers greater design flexibility. Regardless of the type chosen, proper surface preparation, such as cleaning the planter, and multiple thin coats are crucial for optimal adhesion and a professional finish.
2. How can I add texture to my Dollar Tree planters to make them look more expensive?
Achieving a textured finish on Dollar Tree planters is surprisingly simple and cost-effective. One popular method involves mixing baking soda with paint, creating a chalky, rustic effect that mimics the appearance of aged terracotta or stone. Alternatively, sand or joint compound can be added to the paint for a grittier texture. These techniques not only enhance the visual appeal of the planters but also add a tactile element, making them look and feel more high-end. Ensure the mixture is well combined before application for an even texture.
3. Are there any specific safety precautions I should take when DIY-ing Dollar Tree planters?
Safety should always be a priority when undertaking any DIY project. When working with spray paint or other materials that produce fumes, ensure adequate ventilation and wear a respirator mask to avoid inhaling harmful chemicals. Protect your work surfaces with a drop cloth to prevent spills and stains. If using a hot glue gun, exercise caution to avoid burns. Additionally, always read and follow the manufacturer’s instructions for all materials used, and keep tools and supplies out of reach of children and pets.
4. Can these DIY techniques be used on planters other than those from Dollar Tree?
Yes, the DIY techniques described can be applied to planters from various sources, not just Dollar Tree. The principles of painting, texturing, and embellishing remain the same regardless of the planter’s origin. However, it’s important to consider the material of the planter when selecting appropriate paints and adhesives. For example, terracotta planters may require different primers or sealants than plastic ones. Always test a small, inconspicuous area first to ensure compatibility and desired results.
5. How do I ensure my newly decorated Dollar Tree planters last outdoors?
To ensure the longevity of your DIY Dollar Tree planters when used outdoors, it is essential to protect them from the elements. Start by using exterior-grade paints and sealants that are specifically designed to withstand moisture, UV rays, and temperature fluctuations. Apply multiple coats of sealant for added protection. Consider adding drainage holes to prevent water from accumulating in the planter, which can lead to cracking or damage. Regularly inspect the planters for any signs of wear and tear, and reapply sealant as needed to maintain their appearance and durability. Dollar Tree Planter DIY: A Detailed Step-by-Step Guide
This section provides a comprehensive, step-by-step guide on transforming ordinary Dollar Tree planters into stylish and personalized home décor pieces. Each step is detailed with specific instructions, material recommendations, and tips for achieving professional-looking results.
Project Overview:
The project aims to enhance the aesthetic appeal of basic Dollar Tree planters through various DIY techniques, including painting, texturing, and embellishing. The end result is a set of customized planters that reflect individual style and complement existing home décor.
Materials Required:
- Dollar Tree Plastic Planters (various sizes and shapes)
- Spray Paint (matte, metallic, or desired colors)
- Acrylic Paint (optional, for detailed designs)
- Baking Soda (for textured finish)
- Sand (optional, for textured finish)
- Joint Compound (optional, for textured finish)
- Rope or Twine (for embellishments)
- Wooden Beads (for embellishments)
- Faux Moss and Pebbles (for embellishments)
- Rhinestones and Glitter (for embellishments)
- Metallic Leafing (optional, for embellishments)
- Clear Coat Sealant (matte, satin, or gloss finish)
- Waterproof Sealant (for outdoor use)
- Paintbrushes (various sizes)
- Spray Paint
- Hot Glue Gun and Glue Sticks
- Scissors
- Sandpaper
- Mixing Bowls
- Drop Cloth
- Respirator Mask
Step-by-Step Instructions:
Step 1: Preparation
- Clean the Planters: Thoroughly clean the Dollar Tree planters with soap and water to remove any dirt, dust, or residue. This ensures proper adhesion of paint and other materials.
- Dry the Planters: Allow the planters to dry completely before proceeding. Use a clean cloth to expedite the drying process.
- Protect the Work Area: Cover the work area with a drop cloth to protect surfaces from paint and other materials.
Step 2: Painting
- Choose a Painting Technique: Decide whether to use spray paint or acrylic paint. Spray paint is recommended for quick and even coverage, while acrylic paint allows for more detailed designs.
- Spray Painting (if applicable):
- Shake the spray paint can well before use.
- Hold the can approximately 8-10 inches away from the planter.
- Apply multiple thin coats of spray paint, allowing each coat to dry completely before applying the next. This prevents drips and ensures even coverage.
- Rotate the planter as you spray to ensure all surfaces are covered.
- Allow the final coat to dry completely.
- Acrylic Painting (if applicable):
- Select the desired acrylic paint colors.
- Use a paintbrush to apply the paint to the planter.
- Apply multiple thin coats, allowing each coat to dry completely before applying the next.
- Use different brush sizes and shapes for detailed designs.
- Allow the final coat to dry completely.
Step 3: Texturing (Optional)
- Choose a Texturing Method: Decide whether to use baking soda, sand, or joint compound to create a textured finish.
- Baking Soda Texture:
- In a mixing bowl, combine 1 part baking soda with 2 parts paint (spray paint or acrylic paint).
- Mix well until the baking soda is fully incorporated into the paint.
- Apply the mixture to the planter using a paintbrush.
- Allow the mixture to dry completely.
- Sand Texture:
- In a mixing bowl, combine 1 part sand with 2 parts paint (spray paint or acrylic paint).
- Mix well until the sand is fully incorporated into the paint.
- Apply the mixture to the planter using a paintbrush.
- Allow the mixture to dry completely.
- Joint Compound Texture:
- Apply joint compound to the planter using a putty knife or trowel.
- Create the desired texture by varying the thickness and pattern of the application.
- Allow the joint compound to dry completely.
- Sand the surface with sandpaper to create a smooth, uneven finish.
Step 4: Embellishing (Optional)
- Choose Embellishments: Select the desired embellishments, such as rope, twine, wooden beads, faux moss, pebbles, rhinestones, glitter, or metallic leafing.
- Rope or Twine Embellishment:
- Apply hot glue to the planter surface.
- Wrap rope or twine around the planter, pressing it firmly into the hot glue.
- Continue wrapping until the desired area is covered.
- Trim any excess rope or twine.
- Wooden Beads Embellishment:
- Apply hot glue to the planter surface.
- Attach wooden beads to the hot glue, creating the desired pattern or design.
- Allow the hot glue to dry completely.
- Faux Moss and Pebbles Embellishment:
- Apply hot glue or craft glue to the planter surface.
- Attach faux moss and pebbles to the glue, creating a natural, earthy aesthetic.
- Allow the glue to dry completely.
- Rhinestones and Glitter Embellishment:
- Apply craft glue to the planter surface.
- Sprinkle glitter or attach rhinestones to the glue, creating a sparkling, eye-catching design.
- Allow the glue to dry completely.
- Metallic Leafing Embellishment:
- Apply adhesive sizing to the planter surface.
- Allow the adhesive sizing to become tacky.
- Apply metallic leafing to the adhesive sizing, pressing it firmly into place.
- Remove any excess leafing with a soft brush.
Step 5: Sealing and Protection
- Choose a Sealant: Select a clear coat sealant (matte, satin, or gloss finish) or a waterproof sealant (for outdoor use).
- Apply Sealant:
- Shake the sealant can well before use.
- Hold the can approximately 8-10 inches away from the planter.
- Apply multiple thin coats of sealant, allowing each coat to dry completely before applying the next.
- Rotate the planter as you spray to ensure all surfaces are covered.
- Allow the final coat to dry completely.
Tips and Considerations:
- Surface Preparation: Proper surface preparation is crucial for achieving professional-looking results. Clean the planters thoroughly and allow them to dry completely before proceeding.
- Thin Coats: Apply multiple thin coats of paint and sealant, allowing each coat to dry completely before applying the next. This prevents drips and ensures even coverage.
- Ventilation: When using spray paint or other materials that produce fumes, ensure adequate ventilation and wear a respirator mask.
- Hot Glue Safety: Exercise caution when using a hot glue gun to avoid burns.
- Material Compatibility: Ensure that the paints, adhesives, and sealants are compatible with the material of the planter.
- Personalization: Customize the planters to reflect your personal style and complement your home décor.
- Experimentation: Don’t be afraid to experiment with different techniques and materials to create unique and eye-catching designs.
- Outdoor Use: For planters that will be used outdoors, use exterior-grade paints and sealants that are specifically designed to withstand the elements.
Alternative Design Ideas:
- Ombre Effect: Create an ombre effect by gradually blending different shades of paint.
- Stenciled Designs: Use stencils to create intricate patterns and designs.
- Decoupage: Decoupage the planters with fabric scraps, paper cutouts, or other decorative materials.
- Mosaic: Create a mosaic design using broken tiles, glass, or other small pieces.
- Distressed Finish: Create a distressed finish by sanding the paint and allowing some of the underlying material to show through.
This comprehensive guide provides detailed instructions and tips for transforming ordinary Dollar Tree planters into stylish and personalized home décor pieces. By following these steps and experimenting with different techniques and materials, you can create unique and eye-catching designs that reflect your personal style and complement your home décor.